No Knead
Equipment Needed
Kitchen scales
Large mixing bowl
Clean plastic bag
Banneton 21cm diameter
Bread lame (or razor blade)
Enamel roasting tin with lid
Baking paper (please don’t use greasproof paper as it’s not none stick)
Oven gloves
Cooling rack
Ingredients Needed
Starter, fed and ready to use – see my pages on starters and starter care
Strong white bread flour – I like to use Bacheldre Watermill Organic Stoneground Strong Unbleached flour
Water – either boiled and cooled to room temp, or filtered
Salt – I prefer to use sea salt and not table salt
Rice flour – used for dusting bannetons
The Recipe
No Knead Sourdough
75g ripe and ready starter
340g lukewarm water
500g flour
1.5 tsp salt
Extra flour for dusting and rice flour for dusting the banneton
Let’s Bake No Knead Sourdough
This recipe will make one loaf of no knead sourdough and includes approximate timings
Start your dough building mid to late afternoon. I start around 5pm.
Mix 75g of ripe and ready starter with 350g of lukewarm water, and stir them together so the starter is completely dissolved.
Add the 500g of strong white bread flour and 1.5 teaspoon of salt.
Mix it all together loosely. It’ll probably be a bit lumpy and bumpy, just make sure all the flour and water is mixed. It will look like this:
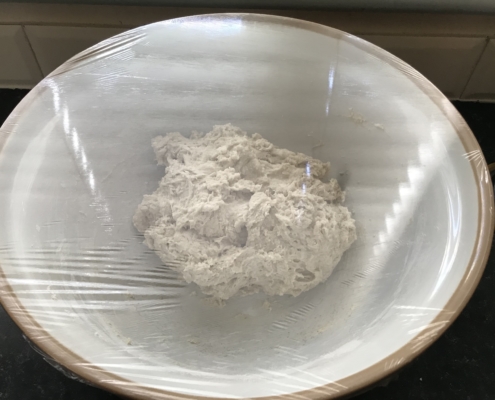
First mix of no knead sourdough bread
As tempting as it seems, don’t start to knead this dough. As the recipe title implies, this is a no knead sourdough bread.
Cover the bowl with cling film and leave to rest on the side for an hour. This resting stage is called “autolyse”.
HINT:
If your kitchen isn’t very warm, like mine, then just set your oven light to be on. That usually creates sufficient warmth in a small space for the dough to rest and rise.
After an hour, lift and fold the dough and bring it into a smooth ball of dough. Literally pick up a handful of dough from one side of the bowl, lift it and fold it over the rest of the dough to the other side of the bowl; you don’t need to pull it tight. Then turn the bowl and repeat the process, do it about 20-25 times maximum, until its a smooth ball.
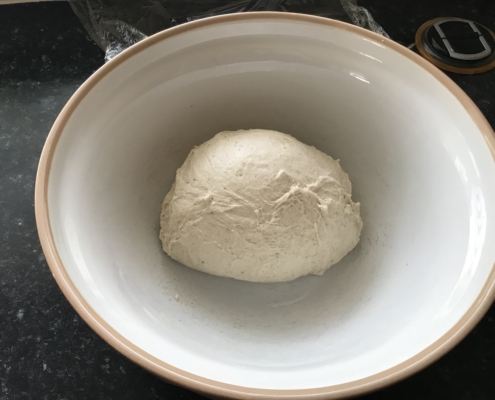
No knead sourdough after stretch and fold
Cover the bowl again and leave it out on the kitchen counter (or pop it back in your warm snug oven). Perform the “stretch and fold” 2 to 4 more times over the next few hours. I normally do this every half an hour until about 10pm, but do whatever works for you. Re cover the bowl, and leave it on the counter overnight, or again in your oven with just the light on if your kitchen is on the cool side. This is often termed as the “bulk fermentation” period.
It’s 10pm and our no knead sourdough bread dough is tucked up for the night.
The Next Day
It’s 8am and I’ve had my first cup of tea of the morning.
In the morning it should have risen in the bowl, be full of bubbles, and look something like this:

Prepare your banneton by liberally dusting it with rice flour. It needs to be really well floured, all the way up the sides, so that the dough doesn’t stick. Normal flour or bread flour draws moisture out of the dough and then in turn sticks to the banneton. Rice flour is excellent at preventing sticking as it doesn’t absorb the moisture from the dough.
Perform another round of stretch and folds with the dough, half a dozen will do, and bring it into a loose ball again. Don’t be too heavy handed and don’t handle the dough too much, this is to preserve the gluten structure and air pockets in the dough.
Place the ball of dough, smooth side down into the banneton.
Sprinkle some rice flour all over the top of the dough too to stop it from sticking to the parchment paper in the baking stage.

Pop the whole banneton into a plastic bag, and put it in the fridge for minimum 1 hour, but anywhere up to about 12 hours. This is the “final proof”.
When you’re ready to bake
For me this about 4pm
Pre-heat the oven to 220C and take the dough out of the fridge whilst the oven comes to temperature.
Once the oven is up to temperature, line your enamel roaster with a sheet of parchment baking paper.
Place the tin over the top of the banneton, then invert it/turn it all over together to turn the dough into the pot.
Scoring and Baking
Slash the top of the dough with a lame or a clean razor blade. Don’t worry too much about a pattern when scoring the dough. Just be confident with your lame or razor blade, and a simple slash across the top, about half an inch deep, will do us for now. The more you bake and the more practise you get will make scoring easier, and more artistic too!
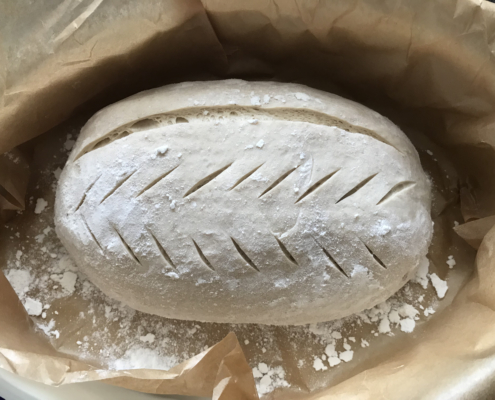
No knead sourdough scored and ready for baking
Pop the lid on and bake it for 50 mins. And don’t peek! The lid is keeping the steam inside, which helps with forming a delicious crust.
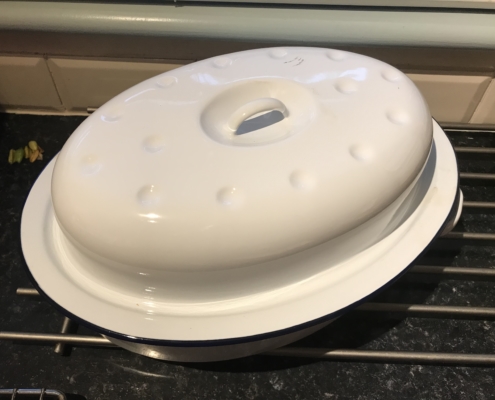
Enamel roasting tin
After 50 minutes, remove the whole pan from the oven, carefully take the loaf from the pan. Then leave the loaf on a rack to cool.
Wait at least an hour for the bread to cool before taking a slice and sampling it. Cutting hot bread open will encourage steam to get inside the holes in the bread. This will make them slightly “gummy”.
After an hour minimum cooling, slice and enjoy your first taste of no knead sourdough bread!
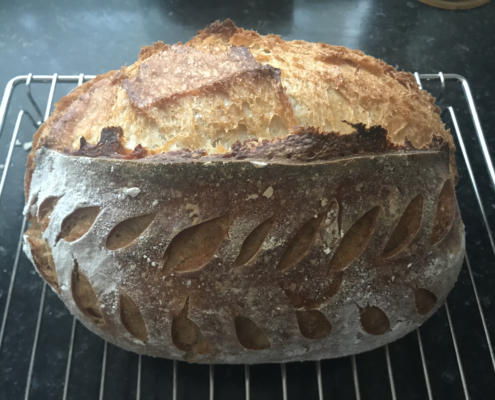
The final result of our baked no knead sourdough bread
Flour salt and water
Sourdough Bread Artisan Bread Bakery Blog
Made with the simple basic ingredients of flour, water and salt; there are three distinct stages to making a sourdough loaf (1) The Starter (2) The Ferment and (3) The Dough itself.
www.sourdoughbread.co.uk
A little bit about this site
I want to offer and share information, tips, techniques, recipes and tools for the home baker, with an above average interest in the art of sourdough bread making.

